Showing posts with label baby gifts. Show all posts

Thursday, April 25, 2013

Those Mesa Ladies and Their Quilts

 Once a month I meet with a
little quilt group out in Mesa.
Those Mesa Ladies
are so much fun to be with!
They provide a wonderful lunch
and we spend a few hours 
quilting away
and yabbering.
I truly don't know what we enjoy the most:
the quilting
or the eating
or the yabbering.
It's probably the mix of all 3 that makes for such a delightful day.
 Peg just got her 
4th of July Pinwheels
back from the quilter.
 Oh, my stars!
Such beautiful quilting!
 Peg was so happy with the final result.
 Karen worked on binding 
a quilt for a new grandson.
 A great Chevron pattern
 Amanda just got her
back from the quilter
 This is a fun raw edge pattern
that works up quickly
 from 
Amanda will toss it in the wash
and once it's dried, the edges will fray up and 
become more 3-dimensional.
 Peg was laying out her latest
Work In Progress
This is such a fun idea Peg organized 
as part of a family reunion.
She asked each family to bring a yard
of Kaffe Fassett fabric
cut into squares.
They traded fabrics with each other
at last years reunion,
and were challenged to go home and 
sew them into a quilt.
They are to bring the finished quilt back to this year's reunion.
Each one will be different,
but all will contain the Kaffe squares.
Now, THAT sounds
like my kind of family reunion.

Wednesday, May 23, 2012

Modern Chevron Baby Quilt Finish

It always feels so good to have a finish on a quilt.

Modern Chevron Baby is now quilted, bound and washed for a special little boy.

Pattern and free tutorial by Kirsty of You Had Me At Bonjour
All of the blues and neutrals came from scraps in my stash.
A fun way to use up what you have kind of quilt.

I even followed Kirsty's suggestions of a straight line echo for the machine quilting.
Easy breezy.
Trust me, if I can do it, anyone can.

I'm pleased with how the stitching showed up on the pieced back, too.

The geometric lines really work well for a guy quilt.
Chevron Baby will be mailed off this week as a present for a special friend.
Welcome to this world little Bennett!

Tuesday, May 1, 2012

Modern Chevron Baby Quilt

I now have a finish on my
Modern Chevron Baby Quilt.
All 306 squares are happily sewn together.

46" X 58"
Kristy of You Had Me At Bonjour provides a free pattern and wonderful tutorial, clear down to the quilting and binding.

My blue and neutral scrap baskets are a little smaller.

Such a great way to use what you have.
I'm all about stash busters right now.

Won't this be a nice addition to a little boys room?
Next step is to make a backing and to quilt the quilt, which I am going to attempt myself.
Machine quilting is not my strong suit, but with Kristy's great instructions, I think it quite possible.

Thursday, March 24, 2011

Knifty Knitter Hat Tutorial

I received a lot of e-mails from non-knitters yesterday, asking how difficult it would be to make a hat using the Knifty Knitter looms.
What better way to answer that question than to just show you with a tutorial.
There are 4 different sized round looms in the package, which also includes the pick and a needle. You can find various sized sets on Amazon.com or in most craft stores.
I'm using the red round loom for this tutorial, which will make a medium/child sized hat.

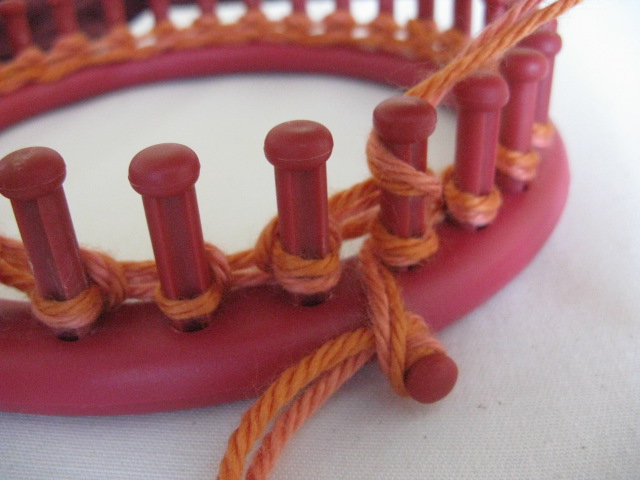
Using two stands of 4-ply worsted weight yarn, wrap the yarn on the edge of the ring. Pull the yarn to the inside of the ring and wrap around the first post. Repeat around the second peg, continuing until all the pegs are wrapped.
Keep the yarn loose as you wrap.

Slide the yarn to the bottom of the pegs, and continue to wrap a second row.

I like to anchor the yarn at this point by wrapping it around the peg on the edge.
Using the pick, lift the bottom row of yarn over the top row of yarn,

and over the top of the peg. Continue with each peg until you have finished one row of knitting.

Make sure you slide the yarn to the bottom of the pegs, and continue wrapping another row.

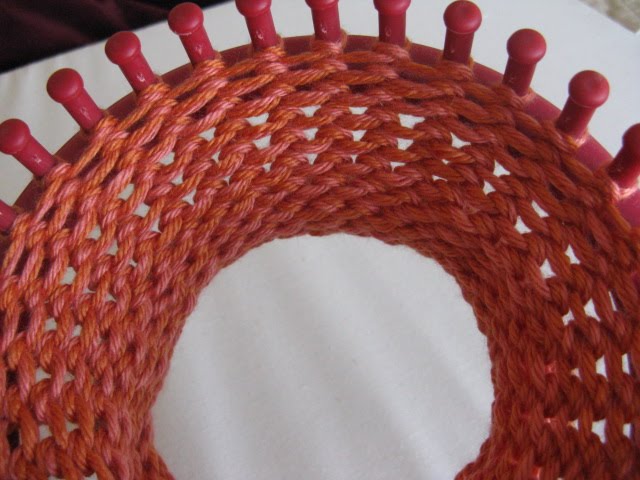
The inside of the loom will look like this.

As you continue to knit the hat will grow longer.
To make the brim on the medium, you knit 4" and stop.

Reach inside the loom and place each loop from the bottom row over the corresponding peg. (*The loop is the long one, not exactly centered).
This will fold what you have knitted in half to form the ribbing on the bottom of the hat.
With the pick pull the yarn loops on the bottom of the pegs over the top ribbing row and over the top of the pegs. This leaves one row that you again, push to the bottom of the pegs.

Continue wrapping and knitting until the medium hat has reached 7-8 inches.

To finish the hat, thread the needle with around 18" of yarn.

Starting with the first peg run the needle and yarn through the loops on each peg, then lift the loops over and off the pegs.

You will see the top start to gather as you go.

This is what the top looks like once you've taken the hat off the loom.

Pull the thread tightly to gather the top

Take a few stitches in each direction to close the gap and secure the yarn.

Poke the needle to the inside of the hat.

And take a few more stitches with a square knot, and clip your threads.

You will see the beginning threads on the inside of the brim. These can be woven in and then clipped off.

Ta Dum! The hat is now complete! See how easy? If you have more questions, there are a lot of good video tutorials on YouTube, or feel free to e-mail me at nedras@mstar.net

These go rather fast. I've now made 3 just since yesterday.
My hats are to be given to Humanitarian Aid, but these would also make nice baby gifts. Pom Poms could be added to the top, or cute crocheted/knitted flowers sewn to the brim.
I had one comment yesterday that these looms are easier than traditional knitting for people with arthritis.
I also think these would be a fun project for children.

Wednesday, November 10, 2010

Minkee Baby Blanket

A friend just had a baby, and I was trying to think of a gift to make that would honor her special occasion.
I wanted the gift to be personal, but because of time constraints I knew I needed something easy to make.

Quilted Works here in St. George, Utah had the perfect solution.
They have the most delightful selections of minkee I have ever seen. A room full of the most soft and snugly designs available on the market.
You just can't help but ooh and aaah and sigh just by touching it.
Makes grown men want to wrap themselves in fabric and take a nap right then and there.
But I digress...

The bolts of Minkee come in 60" wide. Quilted Works makes a baby kit by cutting a yard, and then cutting that yard in half lengthwise. (Making a 30" X 36" piece) They match a cute front to a cute back, and a kit is born.
The only work left to do is:
  • Put right sides together, and sew a seam all the way around leaving a small space for turning.
  • Turn and then stitch all around the edges.
  • Voila! You are done!
  • (yes, it's that easy)

Here are some tips that Quilted Works gave me for working with Minkee:
  • When you first bring the fabric home, throw it in the dryer for about 10 minutes on FLUFF (no heat). This will help remove all those pesky little shreddy pieces.
  • Set your stitch length to be a little longer, around a "3"
  • Use a walking foot.
  • Pin like crazy. This stuff is very slippery. Placing pins close together will make a big difference in the keeping the two pieces evenly together.