Showing posts with label Tutorials. Show all posts

Wednesday, December 3, 2014

Scrappy Crossroads Quilt

 It's beautiful here in the winter in Arizona  :)
Even with a little cloud cover outside today
it's still warm and inviting.
I just finished
Scrappy Crossroads
 Pattern with Free Tutorial
by my friend Lori Holt
of Bee In My Bonnet
can be found 
 A great way to use up scraps!
I knew I saved those little itty bits of leftovers for a reason.
 A total of 
1440
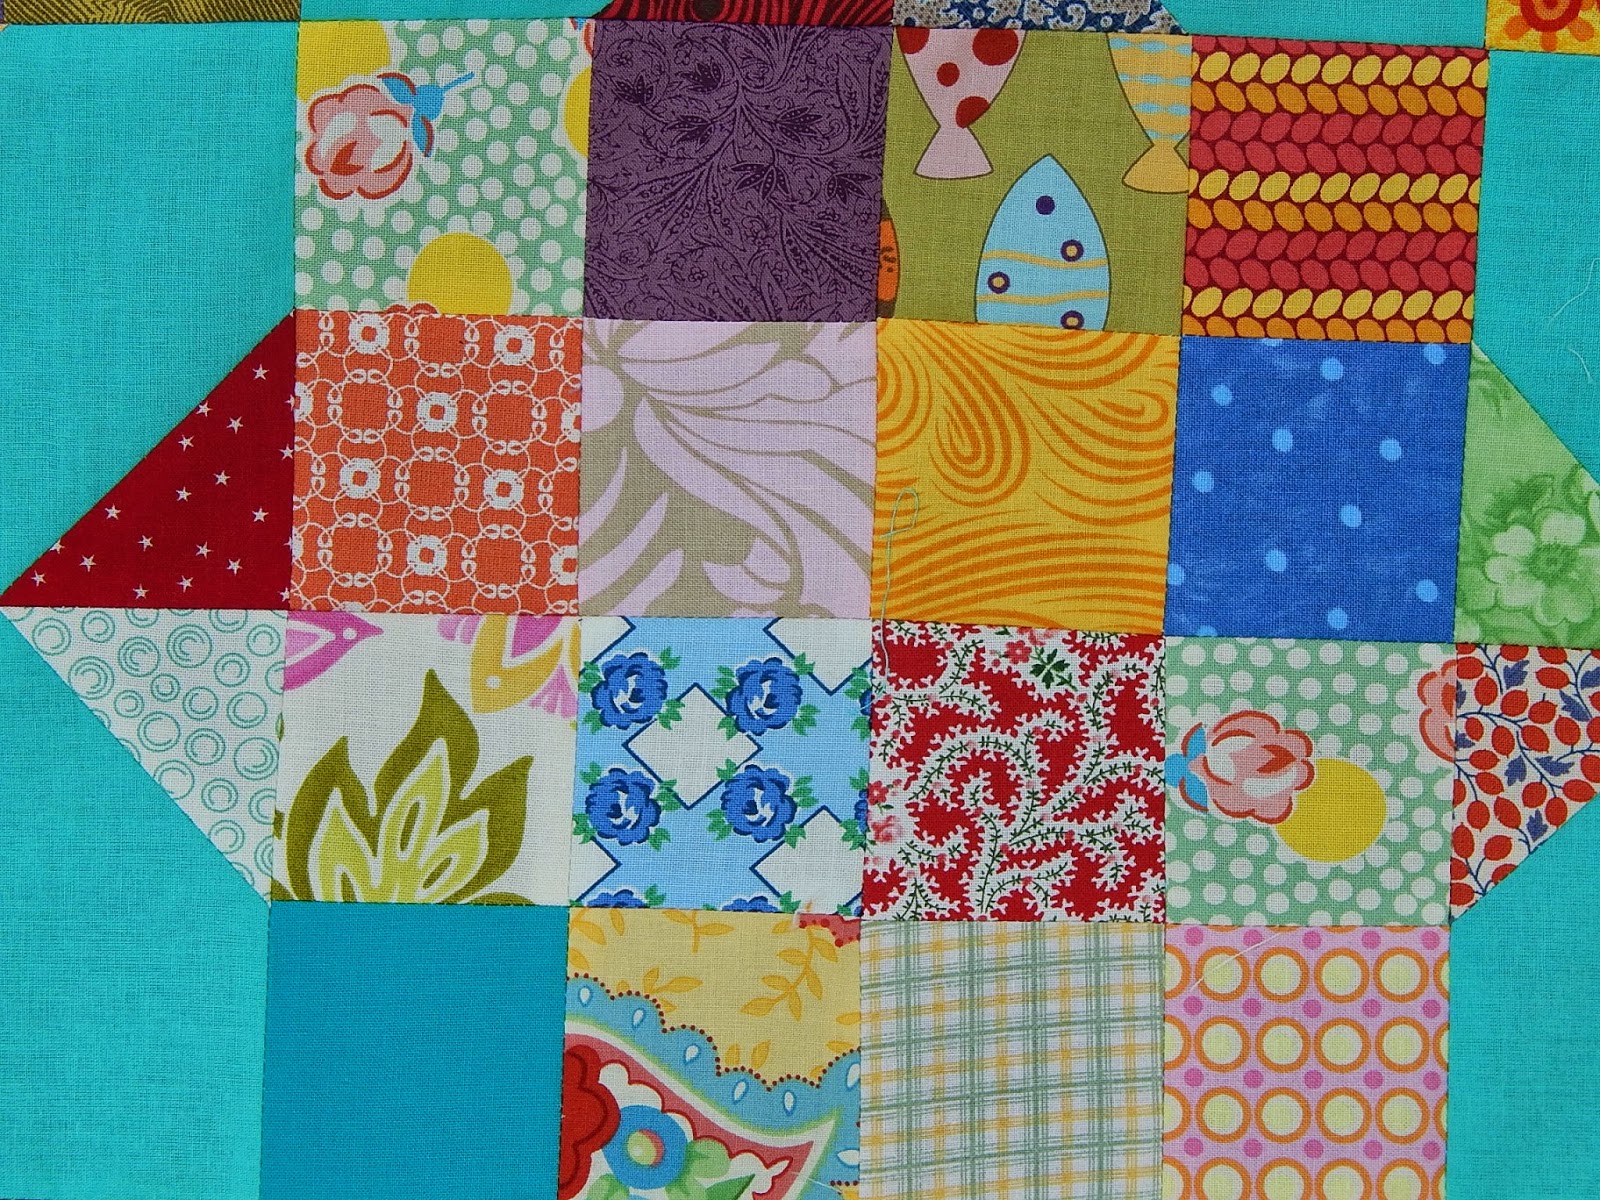
2 1/2 inch scrappy squares 
were used in this project
 For the X part of the block
I used
American Made Brand Cotton
Dark Turquoise
It's the first time I have used this solid
and it was wonderful to work with  !
High thread count and solid to the touch.
 Hey, I remember some of these fabrics
from quilts I made long ago  :)
 And these too!
A trip down memory lane.
 The actual block 
measures 16 1/2 inches unfinished
 You can make the quilt any size you desire.
I opted to make it Twin Size
by putting 
5 rows across
and 
6 rows down.
 I even used some of Lori's fabrics in the scraps
Remember her first fabric line Sew Cherry?
And Millie's Closet ?
Thank you Lori for such a great Tutorial  !!
I feel like I now have a Free Quilt
I'm even considering being brave and
trying to quilt this one myself.
We'll see.

Saturday, August 2, 2014

Sew Sturdy Travel Organizers Class on Craftsy

 My friend 
Annie Unrein
recently filmed a class
for Craftsy
and it's now available to watch!
I can tell you from personal experience that
Annie is an excellent teacher.
I've taken several classes from her
and recommend her highly.
are provided in 7 HD-Video lessons
and can be ordered on Craftsy
In this class you will receive nearly 4 hours of in depth instruction
that can be viewed anytime, anywhere
on your computer or mobile device.
This means you can learn at your own pace,
and repeat the lessons as often as you like.
 With Annie's class you will learn
the secrets to professional quality
bag making.
 You also will receive
 on-going support
with the ability to ask questions and
communicate with Annie
in a virtual classroom.
Very cool.
 Learn how to choose the best batting for quilted components,
 select a stabilizer for bags with great body 
and find out how to sew vinyl and mesh with ease.
Then, turn handles, install hardware and bind edges like a pro. 
Annie will also share insider tips for installing zippers around curves.
 You’ll even discover ways to work with zippers by the yard to save yourself money and time.
If you sign up right away
you can receive the class 
at a 50% discount!
Annie Unrein is the creator of
Soft and Stable
a product that adds 
body and stability to purses and bags.
A quilter for over 40 years, 
Annie has been designing patterns and teaching classes since 2000. 
Her quilts and designs have been published in 
Fons & Porter's Love of Quilting, Quilt, 
Quilter's Newsletter, and Memory Makers magazines.
And on top of that 
she is just one of the nicest people 
you will ever meet.
To learn more about Annie
make sure to visit her web site
https://www.byannie.com/

Monday, July 21, 2014

Day Trip Quilt

 My friend

Niser Holland of Scrappy Quilt Designs
is designer and creator of
I've loved this quilt from the moment I saw it
and have finally had the time to make one
48" X 66"
 The rows are created 
Horizontally
with a simple sew and fold technique.


 "Ash" Gray Kona for the background
and 
Kaffe Fassett scraps for the Geese
Love those Kaffes!
 And a matching Kaffe for the binding.
 I even placed a sleeve on the back.
 Labeled and done.

Monday, July 14, 2014

How To Make A Regulation Quilt Sleeve

 When submitting a quilt to 
Quilt Shows
there are specific regulations 
for the size of sleeve
that needs to be attached to the back of the quilt.
The general rule for most shows request a
4 inch wide sleeve (finished)
that is placed 
1/2 inch from the bound edge
*make sure to check your specific Show Regulations
 Once you have quilted your quilt 
and trimmed the edges you are ready to make the sleeve.
Measure across the top of your quilt
which gives you the
Width of the Quilt
 Cut the sleeve fabric
9 inches long
by the Width of your Quilt
 On both sides of the 9 inch length
press down 1/4th inch
 Turn down 1/4th inch again and press
 Stitch the folded edges.
 Bring the bottom of the sleeve up to the top
matching raw edges.
 With a removable marker
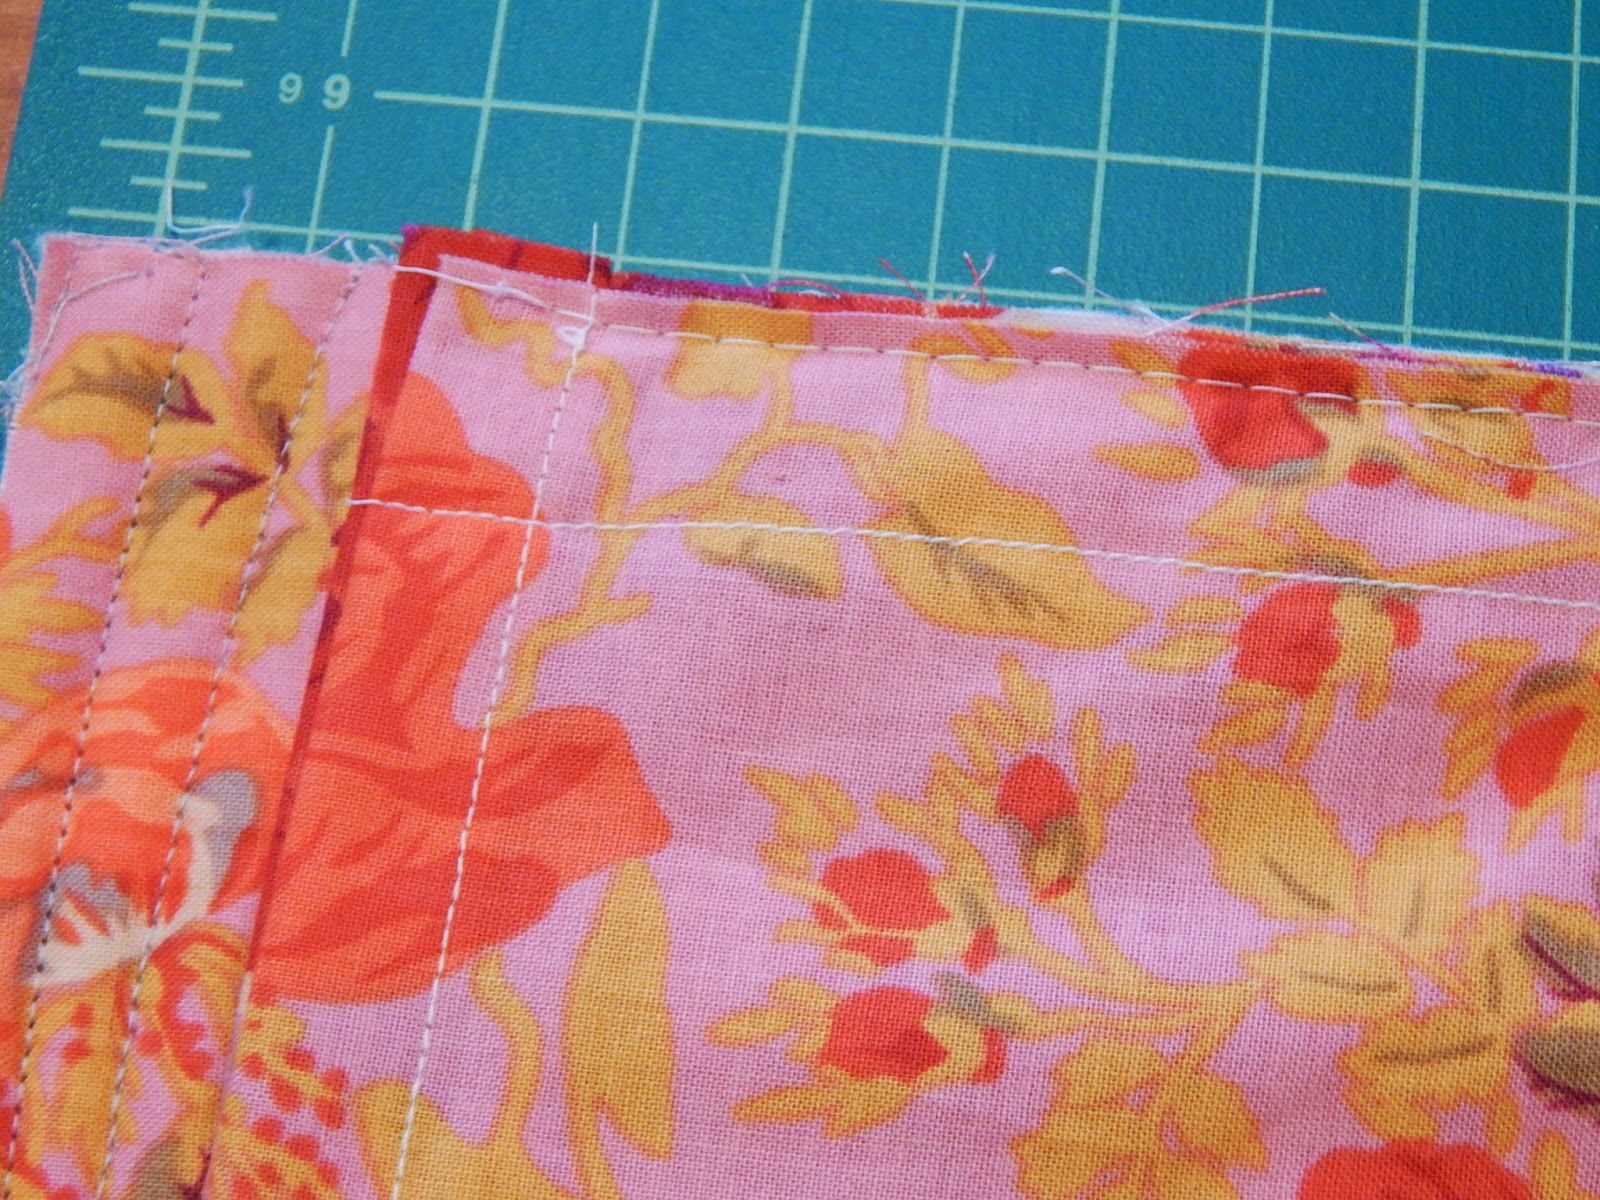
draw a line 3/4 inch from the top of the sleeve.
I like to use Frixion pens where the lines are easily removed
with the touch of an iron.
 Stitch on the drawn line.
 Center the sleeve to the top of the quilt.
Notice this leaves a gap on the end.
Baste the sleeve to the top of the quilt
using about an 1/8th inch seam allowance
 Bind the quilt using a 1/4th inch seam allowance.
 The stitching line at the top of the sleeve
is now is exactly 1/2 inch to the binding line
and your pocket is 4 inches wide.
Hand stitch the bottom edge of the sleeve down to the backing.
The quilt is now ready to be
easily slipped over a rod
and
 hung on display.

Tuesday, December 31, 2013

2013 Was A Very Good (Quilty) Year

 Can it be that we are now at the end of 2013?
Where has the year gone?
One of the nice things about keeping a blog is that
it makes it easy to go back and review what was accomplished.
I always start my end of the year search 
anticipating there won't be much to show.
And then when I begin going through posts month by month
I realize maybe I finished a few more quilts than I originally thought.
There are always twists and turns in life and
2013 was no exception.
This is my 301st Post out of 365 days for the year :)
When I started 2013, I set a goal to 
Finish UP 
quilts that had not been quilted.
You know those stacks that wait patiently in the back of a closet?
As with all good intentions,
I started off with gusto
Star Crazy
The top was completed in early 2011
*I even led an on-line group
and I just needed to meet the right person 
to have it quilted.
 My next quilt to take to Pat was
Rabbits Prefer Chocolate
which was started several years ago
The blocks were completed but the top still
needed a little assembling.
 In March my friend Lori Holt (Bee In My Bonnet)
wrote and asked me
 if I would make a pillow with 
her new Half Hexie Ruler
that had just been launched into the market.
Of course I said "Yes!"
I love everything Lori makes
and I really enjoyed playing with her rulers.
 In April I completed a 
T-Shirt Quilt
as a gift for family members
using Crooked Nickel's
easy to do
fusible technique and
 May brought a very fun completion
after sewing blocks for months
following Lori Holt's (Bee In My Bonnet) on-line tutorials.
Row Along Quilt
will always have such fond memories.
Another goal I had for 2013 was only sew from my stash
and I'm proud to say this entire quilt was made from scraps.
Lori even gave us a design to make the 
cutest label!
 We were very fortunate to be with Lori during those months
because her ideas became the book
Quilty Fun
this last year!
Yay Lori!
Cross Terrain
pattern by Freshly Pieced
was made out of my red and white scraps.

                                              Then my life began to change :)
The book store I worked for 
announced they were
Closing
and 
I began to wonder what I should do next?
Pat had recently purchased 
Triangles On A Roll
and I had the opportunity to become 
Sales Manager
I began to spend hours and hours 
playing with 
all the various papers
 I also started creating my own patterns
(something I had never done before)
and a new pattern company
Cactus Needle Quilts
was launched in July
 What a wonderful 
whirlwind 
it's been since then.
I have learned a lot!
6 new patterns
came out on the market
starting with 
Christmas Pyramids
Gina is made with
the basic Half Square Triangles
 The Eyes Have It
uses Quarter Square Triangles
 Hourglass Squared
also uses Quarter Square Triangles
*even the border is made with QST's
 Baby Waves 
is made from Half Square Triangles
that are simply cut in half.
So easy to do!
 I liked it so much,
I made one in blue.
 And my favorite quilt that I made in 2013
Indian Blanket

I made
Mod Geo Cruiser
as a pattern tester for 
Love that it matches my new aqua Cruiser bike!
 I've also been busy writing 
Tutorials
Scrappy Chevrons
With only a little spare time
I managed to crochet to a finish in 
the last few moments of December
Moss Stitch Afghan
was a gift for my daughter and her husband.
Oh yes, and there were the monthly
Bees Knees blocks
made and sent out to various members of our group.
I learn a lot from these wonderful ladies.
2013 Was a Very Good Quilty Year:)
And I'm excited to see what 2014 will bring!